
I’ve been line by line through zetcode tutorial titled “A Simple button” using the IDE C::B Code::Blocks.
http://zetcode.com/tutorials/wxwidgetstutorial/firstprograms/
This tutorial produces some output that looks like this:
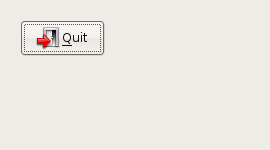
The source looks like this:
#include “button.h”
Button::Button(const wxString& title)
: wxFrame(NULL, wxID_ANY, title, wxDefaultPosition, wxSize(270, 150))
{
wxPanel *panel = new wxPanel(this, wxID_ANY);wxButton *button = new wxButton(panel, wxID_EXIT, wxT(“Quit”),
wxPoint(20, 20));
Connect(wxID_EXIT, wxEVT_COMMAND_BUTTON_CLICKED,
wxCommandEventHandler(Button::OnQuit));
button->SetFocus();
Centre();
}void Button::OnQuit(wxCommandEvent & WXUNUSED(event))
{
Close(true);
}
Information on wxButton can be found here: http://docs.wxwidgets.org/stable/wx_wxbutton.html#wxbutton
Here are some interesting tidbits:
A button is a control that contains a text string, and is one of the most common elements of a GUI. It may be placed on a dialog box or panel, or indeed almost any other window.
Derived from
wxControl
wxWindow
wxEvtHandler
wxObjectInclude files
<wx/button.h>
Ok… that seems straight forward enough..
Comparing the tutorial code to the default contructor from the manual:
Code:
wxButton *button = new wxButton(panel, wxID_EXIT, wxT(“Quit”),
wxPoint(20, 20));
Manual:
Default constructor.
wxButton(wxWindow* parent, wxWindowID id, const wxString& label = wxEmptyString, const wxPoint& pos = wxDefaultPosition, const wxSize& size = wxDefaultSize, long style = 0, const wxValidator& validator = wxDefaultValidator, const wxString& name = “button”)
Constructor, creating and showing a button.
The preferred way to create standard buttons is to use default value of label. If no label is supplied and id is one of standard IDs from this list, standard label will be used. In addition to that, the button will be decorated with stock icons under GTK+ 2.
This one is starting to get a little more intense for me. I need to lay out the tutorial code side by side to see if it makes more sense to me
wxButton
| wxWindow* parent, | panel | |
| wxWindowID id, | wxID_EXIT | |
| const wxString& label = wxEmptyString, | wxT(“Quit”) | |
| const wxPoint& pos = wxDefaultPosition | wxPoint(20, 20) | |
| const wxSize& size = wxDefaultSize | ||
| long style = 0 | ||
| const wxValidator& validator = wxDefaultValidator | ?? | |
| const wxString& name = “button”) | ?? |
Lets see…
It appears to use a button:
- Needs to be on a panel or dialog.
- You can get different little standard icons to Pop up by specifying by using one of standard IDs from this list (Although doing that I’d have to change a other things further downstream in this example)
- To specify a label for the button the wxT was used here. Although there is a some predefined values that can also be used from this list
Ok… Time for a couple of experiments… on this code.
I get the impression from this list that using wxID_EXIT some how automatically populates with a “stock label”. This should be easy enough to test.
(Test 1)
Change:
wxButton *button = new wxButton(panel, wxID_EXIT, wxT(“Quit”),
wxPoint(20, 20));
To:
wxButton *button = new wxButton(panel, wxID_EXIT,,wxPoint(20, 20));
Result:
/home/jonas/projects/zedcode_tutorials/SimpleButton/button.cpp||In constructor ‘Button::Button(const wxString&)’:|
/home/jonas/projects/zedcode_tutorials/SimpleButton/button.cpp|9|error: expected primary-expression before ‘,’ token|
||=== Build finished: 1 errors, 0 warnings ===|
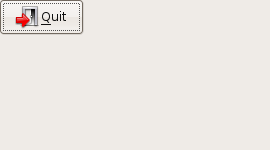
(Test 1.1)
wxButton *button = new wxButton(panel, wxID_EXIT);
Result:
Test 1.2)
wxButton *button = new wxButton(panel, wxID_EXIT, wxT(“Hasta La Vista”));
Result:
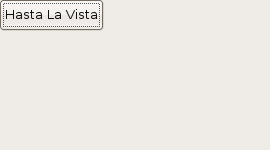
Comment:
This result was unexpected. I thought that I would see the exit door icon since I used the wxID_EXIT. Gotta say Hmmmm.
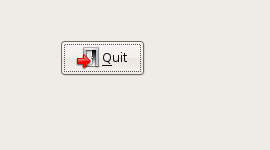
(Test 2)
wxButton *button = new wxButton(panel, wxID_EXIT, wxT(“Quit”),
wxPoint(60, 40));
Result:
I know there are a bunch of other parameters to explore, but for now I just want to get through this tutorial.
Pingback: The metal shaper man’s blog » Looking a bit more at the constraint validator