I basically slapped my qu-bd extruder back to together after some pretty substantial mods, and using a new material ( translucent blue) and tried printing with original settings.. And things didn’t work… Go figure….. I’ve got a few variables to deal with..
What was happening was that the nozzle was scrapping on the top of the print, with a severity that it was causing the motors to loose steps… and print quality was too good either…
So time to reduce some of the variables.
Excesssive Play in Z-Axis:
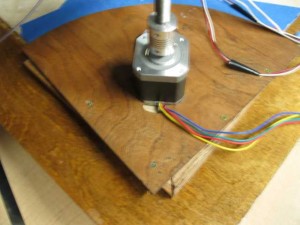
My printer is a custom built. I made some plywood plates to keep my z-axis motors from rotating and I never secured them. I assumed when I was cutting these plates was that the center line of the leadscrew and the z-axis line, intersected the diagonal of my marble plate… A bit of an oversight on my part… doh…. So things are a little off… Perfectly functional… but messes with the whole feng shui aspect of things…. Actually I’m not sure how feng shui’ish a home made 3d printer can be.. but there you go….. If I get around to a MKII rockbot, I think I’m going to redo this entire arrangement. I had been virtually modeling everything in freecad but at this point of the project, I was going freestyle an making stuff on the fly without any drawings. Some basically I screwed the plywood to some oak strips which where located against the edge of the marble plate and now the thing is secure:
X-Axis Rail not Parallel to table:
One thing I noticed is that lost parallelism between the x-axis carriage and the table… I checked that using a shim between the nozzle and the table and adjusted the height by turning the z-axis motors individually. (They where significantly off)
Increased temperature (Unknown if from rebuild or Matl):
With the clear Pla, it seems like things extrude better around pla… but…. I have a new thermistor mounted slightly differently then last time so it could be that…. But for know for this material, 210C is where I’m at this I get the other unknowns stabilized…
E Adjustment:
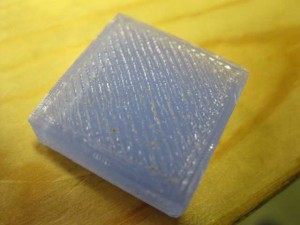
Things seem to have improved with the above changes… But I ran a calibration block and I don’t like the results I’m getting on the rapid fills… Part of the rework was I through a different hob wheel on, I’m wondering if the pitch diameter changed a tiny bit and the extruder is putting out slight more per step… Soo… I need to refer back to my calibration notes. (What a yucky post… http://www.metalshaperman.com/?p=1565 (The wife just called saying about how she mentioned to her co-workers that they want to see samples… ) which refers me to hunters guide.. http://reprap.org/wiki/Triffid_Hunter%27s_Calibration_Guide
Soo…. I’m going to measure and mark off and extrude 100 mm and see the difference between theory and actual… The results 100 mm theory equals about 108mm actual… Wow… theory, observation measurement jive…. I’m feeling lucky…
My current settings are float axis_steps_per_unit[] = {87.489, 87.489, 3023.622,108};
I believe I need to adjust the 108… The formula is:
calculate new_e_steps = e_steps * 100mm / measured_distance
108*100/108 = 100 (Now that’s easy math…) I’m feeling luck plus running out of time before work, so I’m just going to flash the new value into the firmware and start printing…
Running a test print:
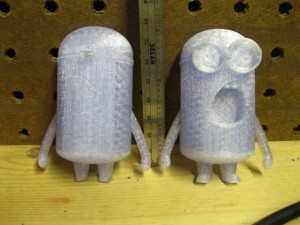
So.. I’m seeing some very interesting things in my test print… I’m using this http://www.thingiverse.com/thing:34204 and I’m printing both halfs at the same time. On the first couple of layers one half is printing beautifully and the other half started printing with squigly lines… I’m thinking I still have some paralleism issues… Hopefully things will even out on the next couple of layers. Also, I think I’m going to need to start playing around with retraction…. (which is something I haven’t really worried about yet… It seems like things get a bit thicker on the ends than they should be….
So on the third solid infil layer things seem to have evened out a bit… I wonder if someone has made a fixture for testing parallellism…. I seems like this would be easy enough to print out… Hmmmmm. I could use that lettering stuff I’ve been messing around in freecad..

Conclusions:
So far I got about 5 hours (according to Repartier pre-calculated time) of printing in with the custom Modification that I did… I’ve had a bunch of bad prints but I think that was more calibration issues than anything. I fixed up the play on my z-axis. Aligned the x-axis parallelism, and tuned the mass flow.
Next Steps:
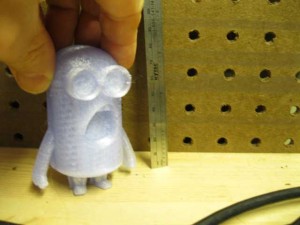
It was a bit of serendipity was that I printed the despicable me’s. Basically i was talking to the wife at work and she told me one of her co-workers would love one. I provided me an indication that I’m having some type of alignment issue still. In first three layers I had a major difference in print quality, which I’m attributing to my feeler gauge aligment not being accurate enough… I think I’m going to break out the dial indicators and see if I can do a more quantitative vs qualitative analysis as to why I’m having these issues.
After that probably print some green to see if it runs at a cooler temperature.
At that point, hopefully I can run some hours to see how the mod holds up… (I probably would get a wiper for the filament to reduce clogging issues.) I’m feeling pretty good about it… I’m planning on popping out another PTFE stub/nut combo and another custom tube so he could give it a try on his qu-bd extruder.

